Adding a Camera
- Go to Settings > Cameras and click Add a camera. If no camera exists yet, the same button also appears on the Alerts tab and, once a device is connected, on the Live tab.
-
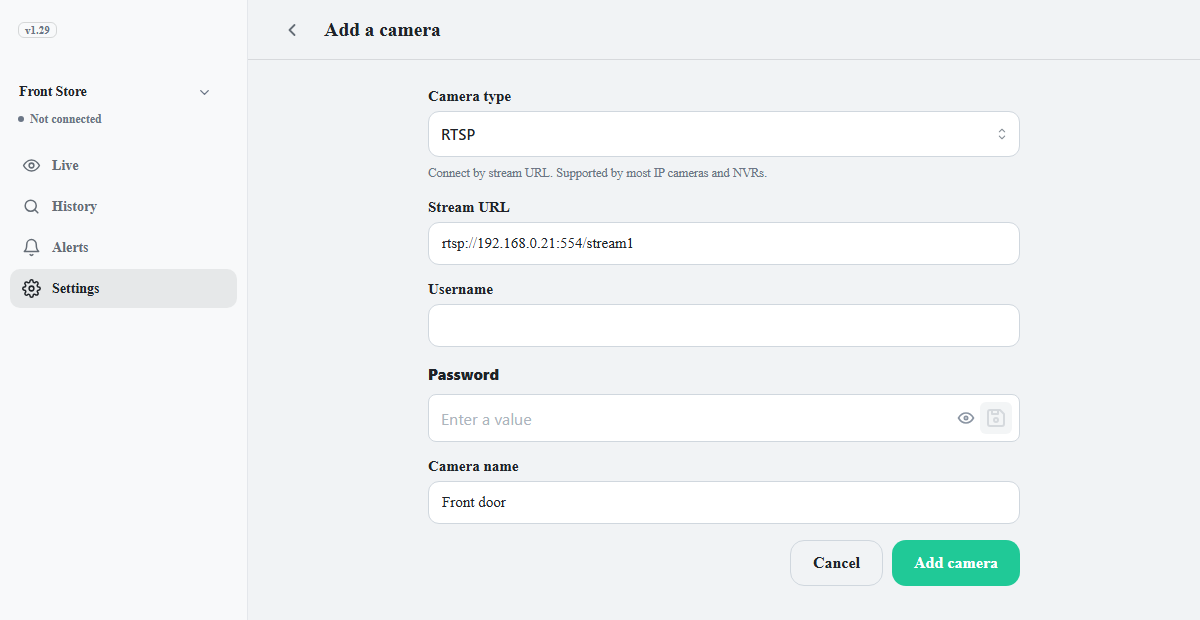
Under Camera type, select the connection method.
Camera type Input RTSP
(the standard streaming protocol of IP cameras)Stream URL, plus Username and Password. The URL is listed in the camera’s manual. Example: rtsp://192.168.0.10:554/streamONVIF
(the discovery standard of IP cameras)Select the camera in the search window and enter the username and password. USB / UVC Select the camera from the list. - Enter an identifiable name in Camera name, such as Front door.
- Click Add camera. You return to the camera list, and the You have unsaved changes bar appears at the bottom of the screen.
- Click Save on that bar. If the device is running, the Restart device dialog appears. Click Apply; the device restarts and the new camera appears on the Live tab.
Editing, switching off, and deleting a camera
In Settings > Cameras, click a camera row to open the Edit screen. Change the values and click Save to return to the list; the change reaches the device only when Save on the save bar at the bottom is clicked. Delete this camera at the bottom of the edit screen works the same way, and until you save, Cancel on the save bar undoes it.
The switch on a camera row turns the camera off and on. The row reads Status: Running or Status: Off. A camera that is off stops analysis, recording, and alerts; recordings already saved are kept. Switching a camera also takes effect only after saving.
Deleting a camera also deletes alerts that watch only that camera. Alerts that watch several cameras keep working on the remaining ones. Recordings already saved are kept and remain available on the History tab.